Service handleiding Gessi oxygene 13173 keukenkraan.

Begin altijd als u een kraan demonteert met het afsluiten van de waterleiding (meterkast of in luik bij de voordeur) of zet de stopkraantjes in de spoelkast dicht.
Onderdelentekening Gessi 13173
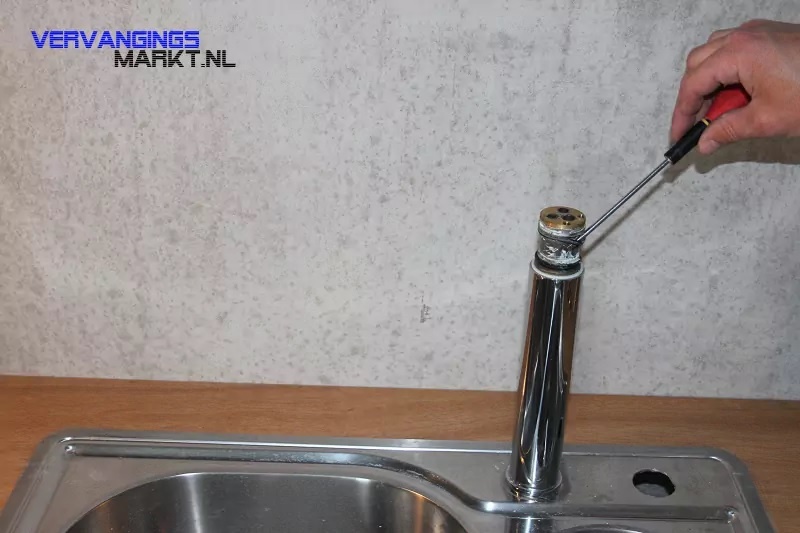
1.
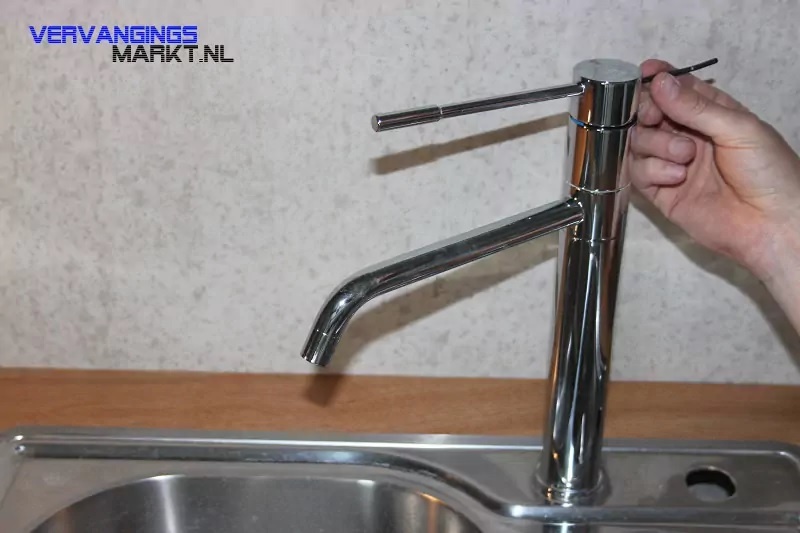
Haal aan de achterkant van de kraan het dopje uit het gaatje met een klein mesje.
Neem inbussleutel 2.5 en draai de hendel los.
Onder de hendel zit een ring met een bolvormige bovenkant, deze kunt u er ook met een mesje afwippen.
Hieronder zit een zwarte kunststof ring met kleurmarkering rood blauw.
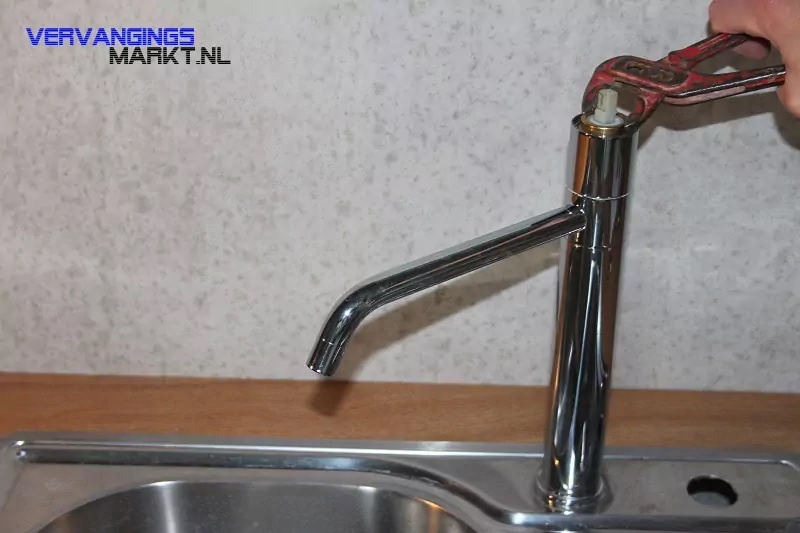
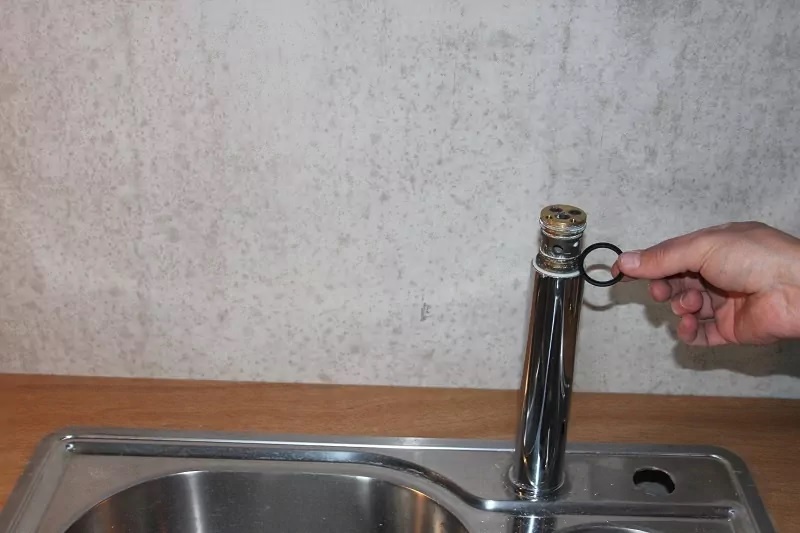
2
Draai met een waterpomptang of een grote steeksleutel de messing moer los. U kunt het beste de kraan even aan onderkant (lange buis) even vasthouden.
3.
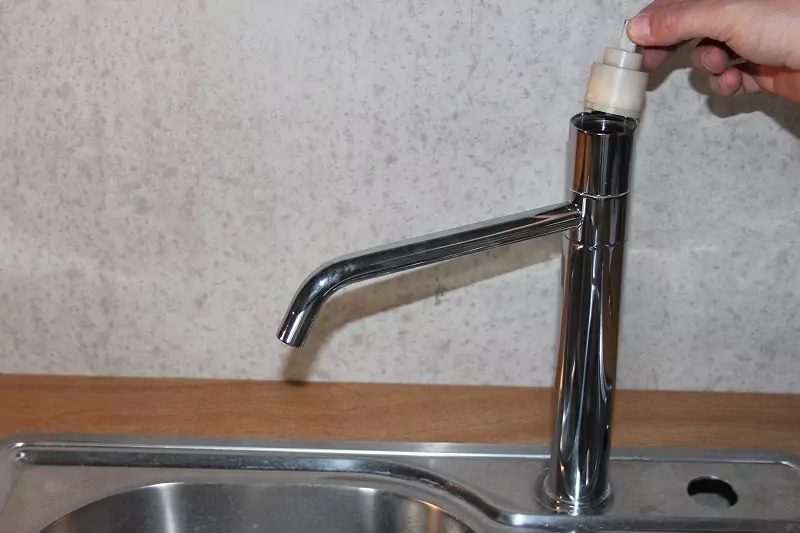
U kunt nu het binnenwerk 01156 uit de kraan pakken.
Als de kraan alleen uit de uitloop drupt (waar normaal ook water uit komt) vervang dan het binnenwerk en zet de kraan in omgekeerde volgorde weer in elkaar. Als de kraan ook tussen de gleufjes van de uitloop lekt dient u de ringen R0573 te vervangen.
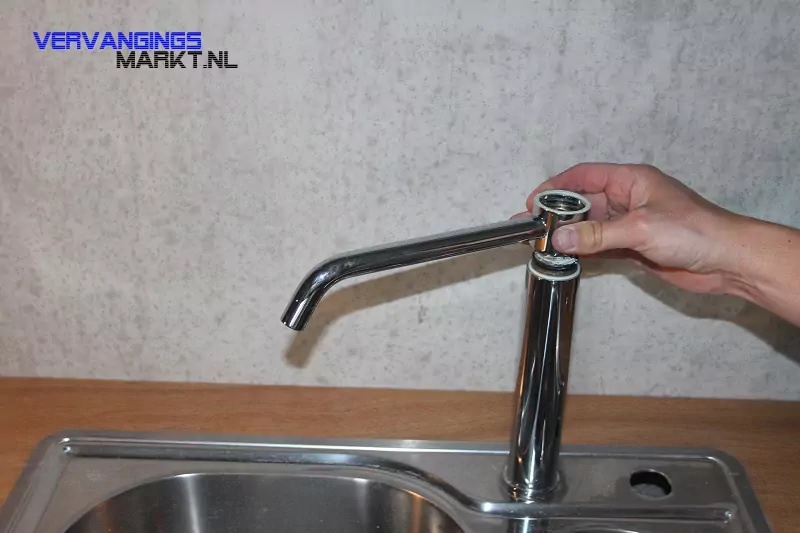
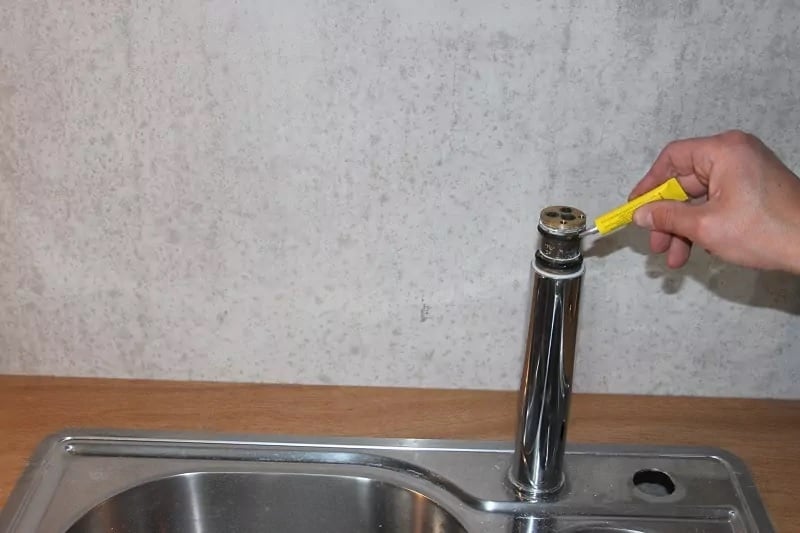
4.

Draai de huls welke om het binnenwerk zat tegen de klok in los. Dit kan soms zwaar gaan ivm kalk afzetting. Gebruik een ontkalker of geef de kraan een aantal tikjes met een kunststof hamer om de kraan te laten schrikken.
5.
Als de huls los is kunt u de uitloop er omhoog aftrekken.
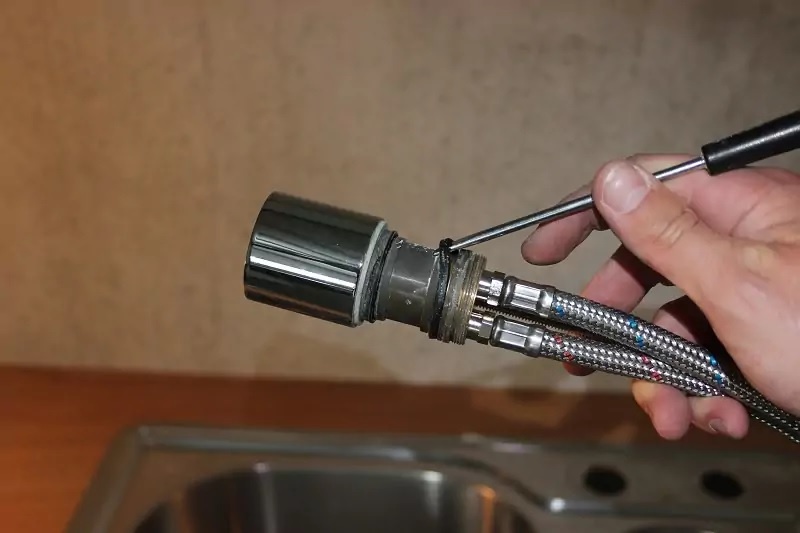
6.
Wip met een schroevendraaier de kapotte ringen van het kraanhuis af. Poets hierna het kalk van de kraanhuis.
7.
Doe hierna de ringen om het kraanhuis.
Aan de onderkant ziet u eerst een witte kunststof glijringen.
Hierna plaatst u de onderste ring om het kraanhuis. (de opening in de gleuf moet omhoog wijzen)
Hierna plaatst u de bovenste rubber ring om het kraanhuis (de opening in de gleuf moet omlaag wijzen)
Smeer nu de ringen in met kranenvet.
Zet nu de kraanuitloop weer om het kraanhuis.
leg nu de 2e glijring op de kraanuitloop.
Draai nu de huls waar de cartouche inzat met de klok mee op het kraanhuis.
8.

Soms lukt het niet om de kraan vanaf bovenaf volledig te demonteren. Volg dan onderstaande stappen.
Draai de kraan los van het blad.
Haal de onderste ring los van het blad.
Geef de kraan een paar tikjes met een kunststof hamer zodat de kraan schrikt.
Draai de lange koker van het kraanhuis.
9.
Demonteer de kraan en ga verder naar stap 6 van de beschrijving.
Als uw kraan weer volledig gemonteerd is kunt u de hoofkraan of hoekstopkranen weer open draaien en kunt u weer genieten van een lekvrije keukenkraan.


