Quooker Fusion cartridge vervangen
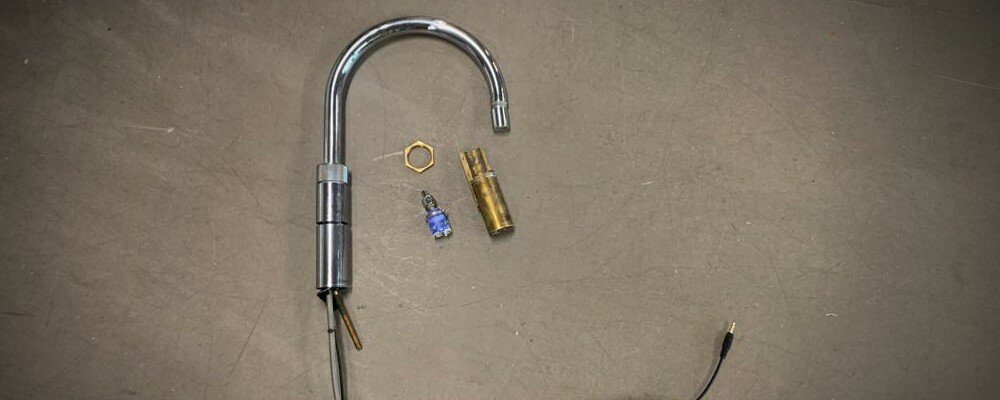
Vervanging cartridge Quooker Fusion na augustus 2015
Bestel hier de serviceset.
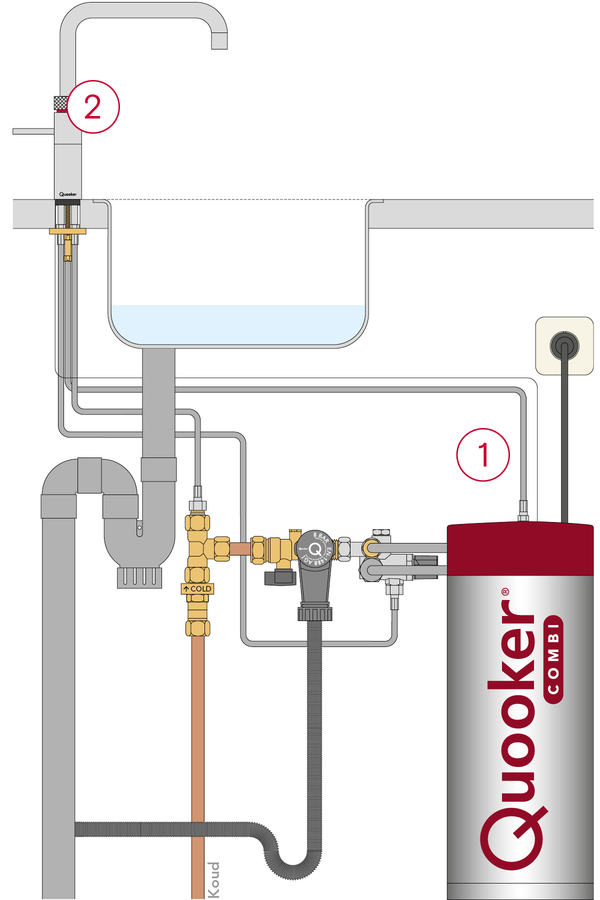
Stap 1
Zet de Quooker uit door op de ‘Q’-knop bovenop het reservoir te drukken. Laat de stekker in het stopcontact.
Stap 2
Laat de kokendwaterkraan stromen totdat het water koud is.
- Draai de hoofdkraan of stopkranen in het keukenkastje dicht.
- Om overtollig water uit het leidingnet te laten stromen, is het mogelijk om op andere plaatsen een kraan open te zetten.
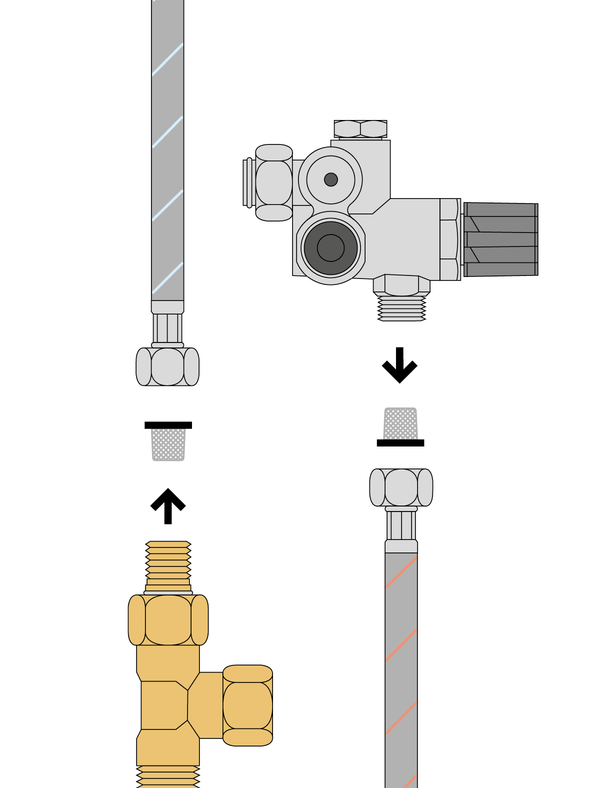
Stap 3
Koppel de warm- en koudwaterslang los en verwijder alle pakkingen en/of slangzeefjes.
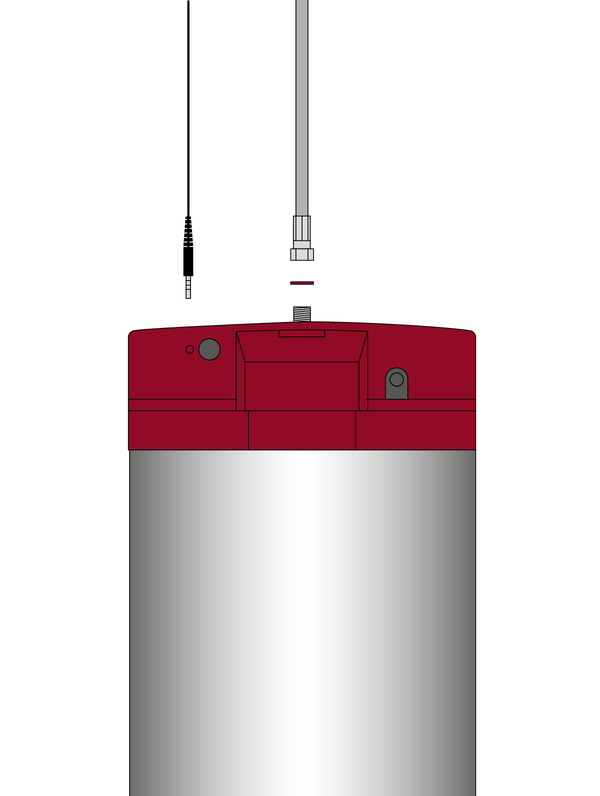
Stap 4
Koppel de kokendwaterslang los van het reservoir en trek de plug uit de rode kap. Verwijder de pakking van de kokendwaterslang.
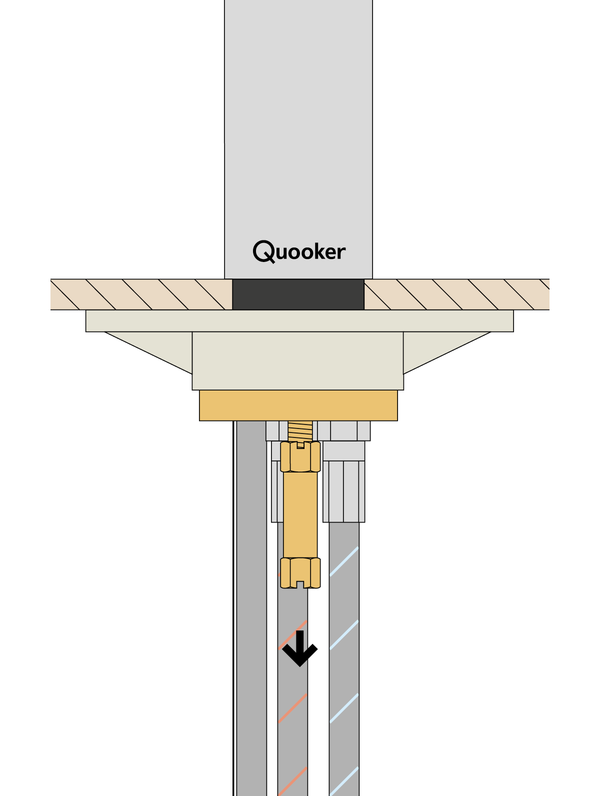
Stap 5
Draai de aantrekmoer los met de meegeleverde pijpsleutel.
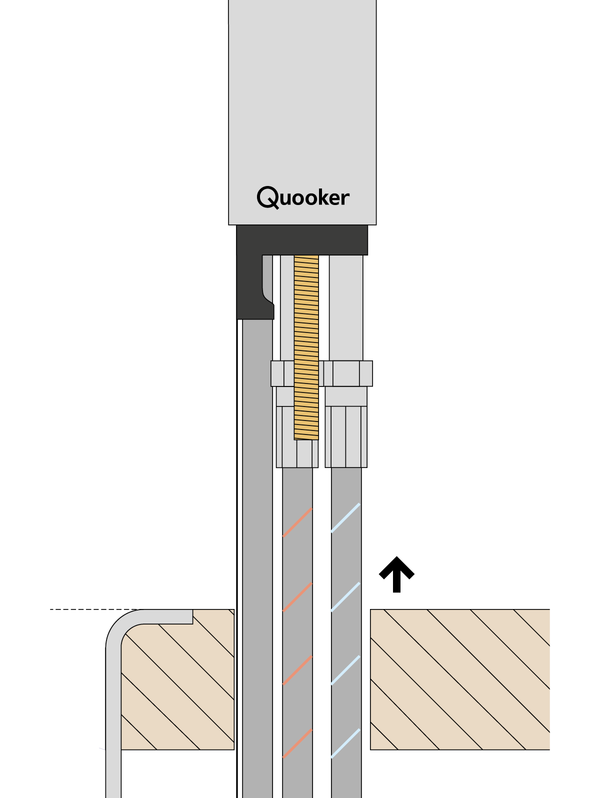
Stap 6
Verwijder de kraan uit het kraangat.

Stap 7
Draai de koud- en warmwaterslang uit de kraan. Draai de ronde moer los met de meegeleverde pijpsleutel en haal de zwarte centreerring van de kraan.

Stap 8
Verwijder de kraanmantel en draai met een waterpomptang de hendel (vervangingsonderdeel) los van de kraan door tegen de klok in te draaien. Als de schroef vast blijft zitten, maak deze dan los met de meegeleverde inbussleutel. Trek het ledsnoer uit de groef.
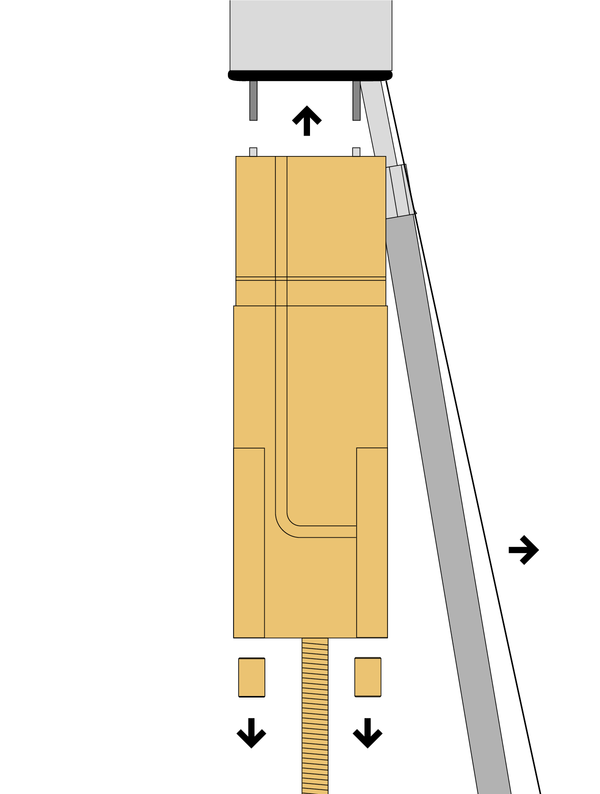
Stap 9
Draai met de andere inbussleutel de twee messing busmoeren los en verwijder de bovenkant van de kraan door voorzichtig aan de uitloop te trekken.
Let op! De kokendwaterslang heeft wat hulp nodig, die moet voorzichtig naar buiten worden getrokken. Ook de paspennen in het onderblok moeten blijven zitten.
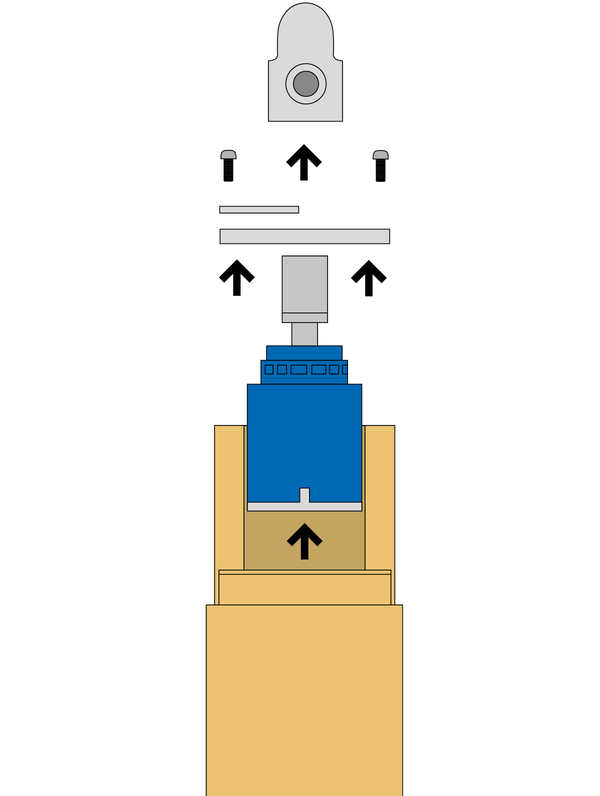
Stap 10
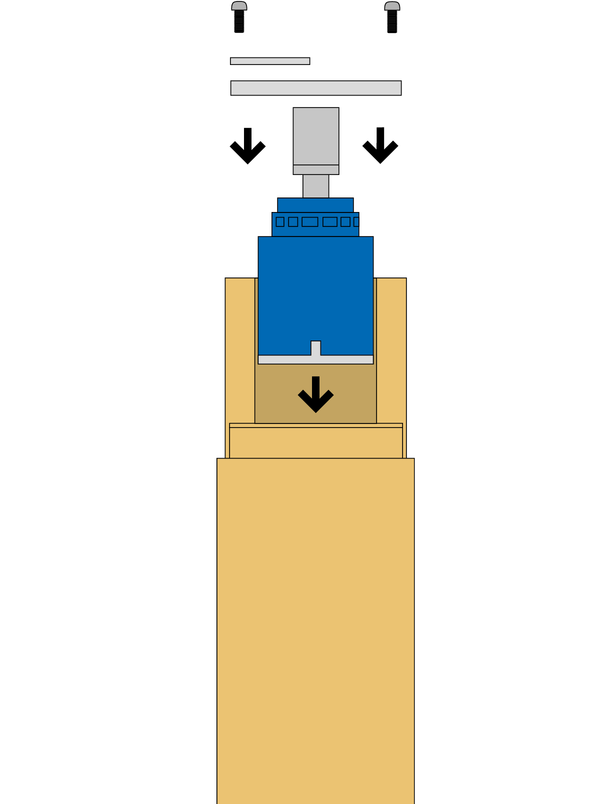
Draai met de bijgeleverde Torx sleutel de twee schroeven naast de cartridge los. Verwijder de cartridge uit het kraanhuis. Let op dat het rubber van de oude cartridge niet achterblijft.
Stap 11
Plaats de nieuwe cartridge met de beugel en het kammetje in het kraanhuis. Doe een druppel van de meegeleverde lijm op het schroefdraad van de Torx schroeven. Draai deze vast met de Torx sleutel. (het balgje kan je eventueel al om het binnenwerk plaatsen)
Stap 12
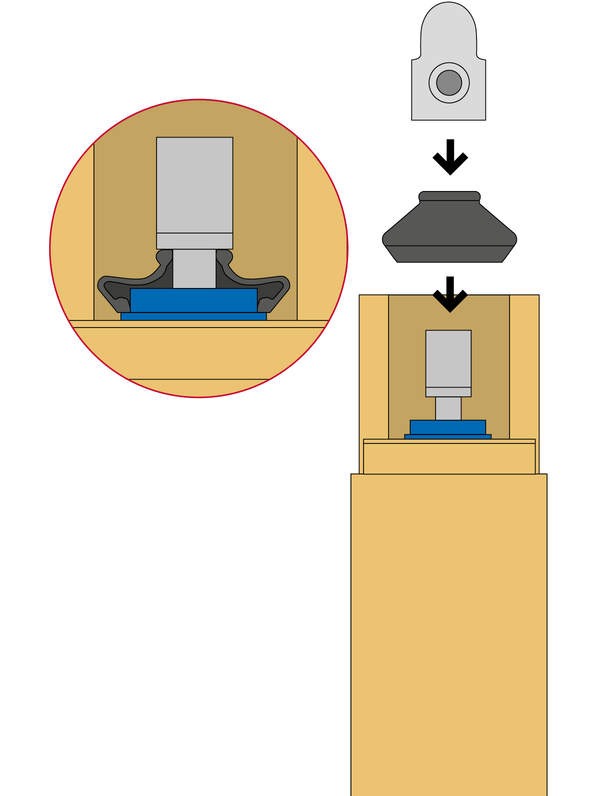
Trek het rubberen balgje over de bovenkant van de cartridge. Zorg dat het balgje goed op zijn plek zit. Plaats de hendelconnector op de cartridge.
Stap 13
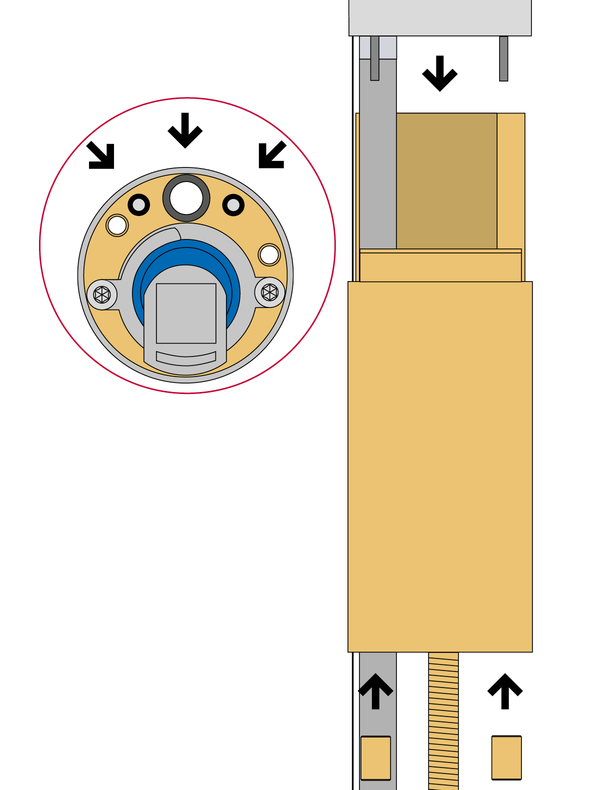
Vervang de O-ring op de bovenkant van het kraanhuis en controleer of de twee paspennen aanwezig zijn. Schuif de bovenkant van de kraan terug op het kraanhuis. Doe een druppel lijm op het uiteinde van de draadeinden en draai de busmoeren goed vast.

Stap 14
Schuif de mantel met het logo rechtop terug om het kraanhuis. Let op! In de mantel zit een uitsparing. Deze valt over de nok in het kraanhuis. Druk de mantel stevig aan tot deze vast klikt. Schuif de zwarte centreerring over de kokendwaterslang. Draai de ronde moer vast met de bijgeleverde pijpsleutel.
Stap 15
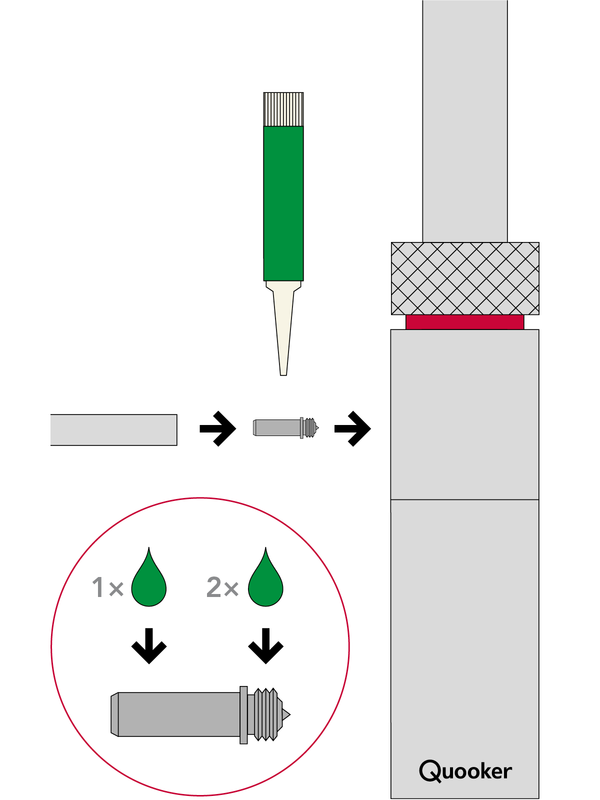
Doe twee druppels lijm op de schroef en draai deze vast in de hendelconnector met de meegeleverde inbussleutel. Doe een druppel lijm op het gladde gedeelte van schroef en schuif de nieuwe hendel er overheen. (er zijn ook versies met alleen maar schroefdraad)

Stap 16
Draai de koud- en warmwaterslang terug in het kraanhuis.
Stap 17
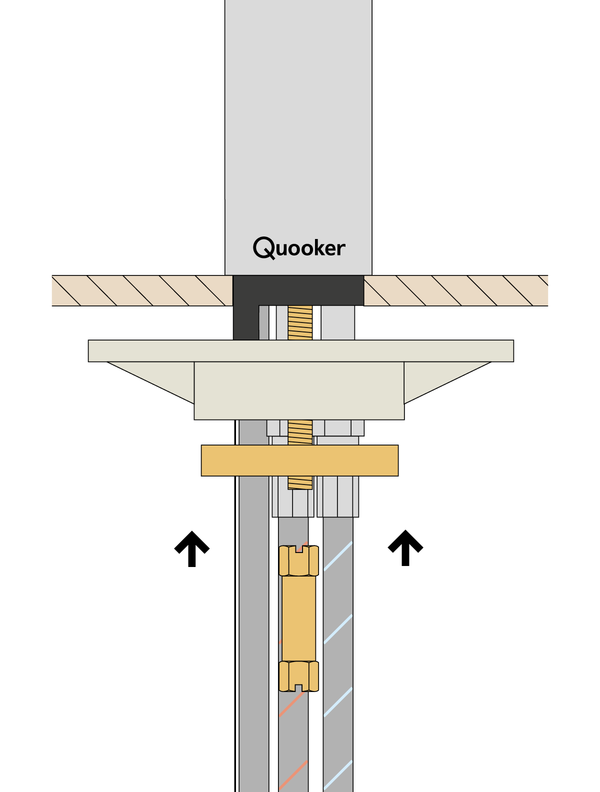
Duw de kraan door het gat in het aanrecht en gebruik bij een dun aanrechtblad de kunststof driehoek. Let op dat het ledsnoer niet bekneld raakt. Plaats het hoefijzervormige klemdeel om de slangen. Draai de aantrekmoer op het draadeind; maar nog niet helemaal vast.

Stap 18
Draai de kraan met het Quooker-logo recht naar de gebruiker, de bedieningshendel staat in koude stand evenwijdig aan de rand van het aanrechtblad.
Stap 19
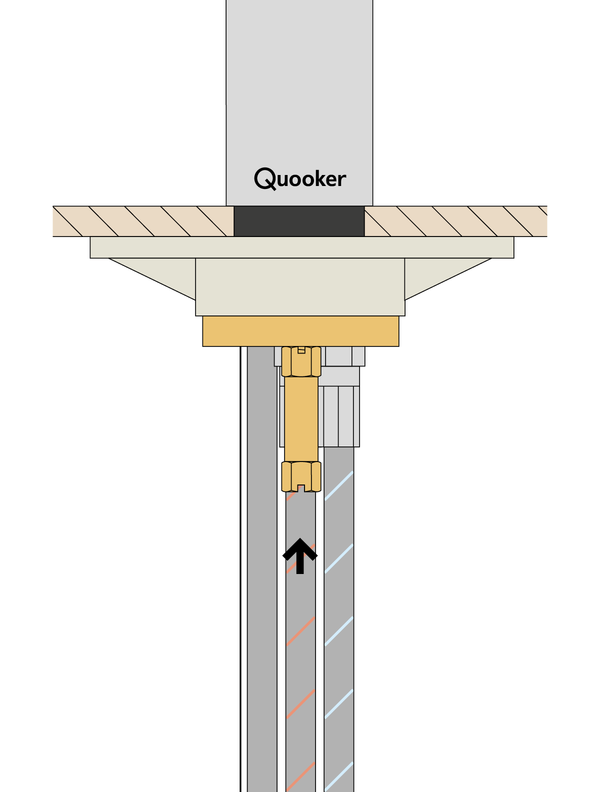
Draai de aantrekmoer nu vast met de meegeleverde pijpsleutel.

Stap 20
Sluit de warm- en koudwaterslang aan met de meegeleverde slangzeefjes (deze dienen direct als afdichting).
Stap 21
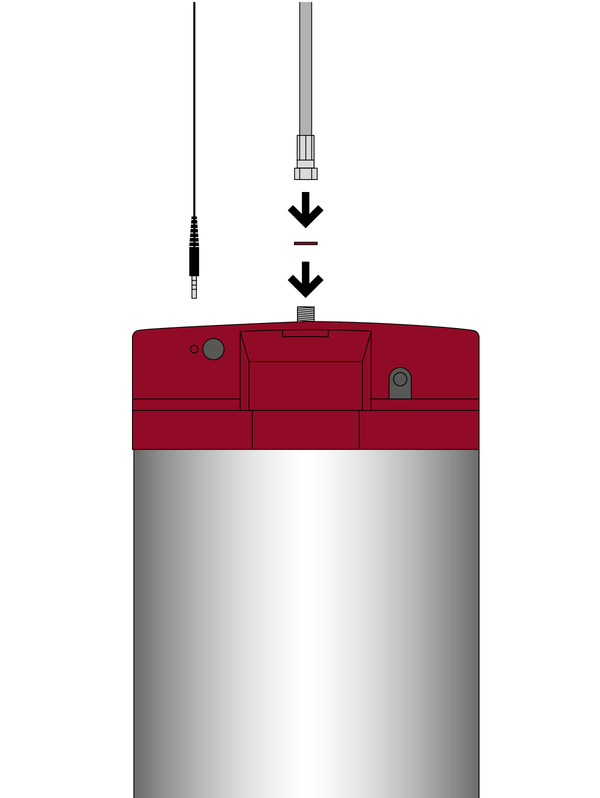
Gebruik bij het aansluiten van de kokendwaterslang de rode fiberring. Steek de plug van het ledsnoer terug in de kap.
- Draai de hoofdkraan of de stopkranen weer open en controleer op lekkage in het kastje. Open hierbij ook de mengkraan om deze te testen.

Stap 22
Zet de Quooker aan door op de ‘Q’-knop bovenop het reservoir te drukken.
- De Quooker zal na ongeveer 15 minuten op temperatuur zijn.
Succes met het installeren.


