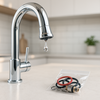
Hoe vervang je een kraan binnenwerk

Hoe vervang je een kraan binnenwerk
Het vervangen van een kraan binnenwerk (cartouche) is een relatief eenvoudige klus die je zelf kunt uitvoeren. Het is echter wel belangrijk om de juiste stappen te volgen om te voorkomen dat je de kraan beschadigt.
Wat heb je nodig?
- Een nieuw kraan binnenwerk
- Waterpomptang/baco
- Schroevendraaier
- Handdoek
- hamer
- rubber huishoudhandschoenen (voor de grip)
Stappenplan
- Sluit de hoofdkraan af
De eerste stap is om de hoofdkraan af te sluiten. Dit doe je om te voorkomen dat er water uit de leidingen stroomt terwijl je aan de kraan werkt.
- Laat de leidingen leeglopen
Laat de leidingen goed leeglopen voordat je begint met het demonteren van de kraan. Dit doe je door de kranen open te draaien. Als u op de beneden verdieping bezig bent is het handig om ook de kranen boven even op te zetten om het gehele leiding systeem leeg te laten lopen.
- Demonteer de hendel
De manier waarop je de kraan moet demonteren, hangt af van het type kraan. Bij een één hendel mengkraan verwijder je eerst de knop(pen) van de kraan. Dit doe je door meestal aan de achterkant van de knop het dopje los te wippen met een mesje en vervolgens met een inbus (meestal maat 2.5 de inbus los te draaien. Vervolgens trek je aan de hendel met een wiebel beweging en zal de hendel los komen. Onder de hendel zit vaak een bolle ring, deze kan je vaak los draaien door met een rubber huishoud handschoen te ring beet te bakken (voor de grip) en dan draaien.
Mocht hij erg vast zitten, geef dan een paar tikjes op de ring zodat hij schrikt en draai dan aan de ring.
Heeft u een twee greeps kraan, dan kan het zijn dat de hendels/knoppen vast geklikt zijn. U dient dan aan de knop te trekken met een beetje een wiebel beweging en de knop zal loskomen.
- Verwijder het oude binnenwerk
Zodra de kraan is gedemonteerd, kun je het oude binnenwerk verwijderen. Dit doe je door de schroeven/moer of bouten los te draaien waarmee het binnenwerk vastzit. Of door het binnenwerk met meestal steek/ring sleutel 17 los te draaien.
- Installeer het nieuwe binnenwerk
Zorg er voor dat de ringen van het oude binnenwerk niet in de kraan blijven zitten. Kijk ook of het gat waar het binnenwerk in zit helemaal leeg en schoon is. Plaats het nieuwe binnenwerk en zorg dat het goed vastzit. Zorg dat de rubbers op het binnenwerk ingevet zijn met kranenvet.
- Monteer de kraan
Monteer de kraanonderdelen in omgekeerde volgorde van de demontage.
- Open de hoofdkraan
Open de hoofdkraan en controleer of de kraan goed werkt.
Klustips
- Zorg ervoor dat je het juiste binnenwerk koopt. Het binnenwerk moet passen bij het type kraan.
- Zorg ervoor dat de schroeven of bouten goed vastzitten, maar niet te vast (handvast).
- Controleer of de ringen van het oude binnenwerk niet in de kraan blijven zitten.
- Laat de kraan even lopen om te controleren of er geen lekkages zijn.
Veiligheidstips
- Draag altijd handschoenen bij het werken aan leidingen met water.
- Zorg ervoor dat de ruimte goed verlicht is.
- Wees voorzichtig met scherpe voorwerpen.
Mogelijke problemen
- Als de kraan niet goed werkt, kan het zijn dat het binnenwerk niet goed is geïnstalleerd. Controleer de installatie dan opnieuw.
- Als de kraanhendel de verkeerde kant op draait, dan heeft u een verkeerd binnenwerk besteld.
Er is voor kranen met hendels een Links en Rechts sluitend binnenwerk (zie informatie)


